Control MovieClips and Use Filters
Timeline Actions
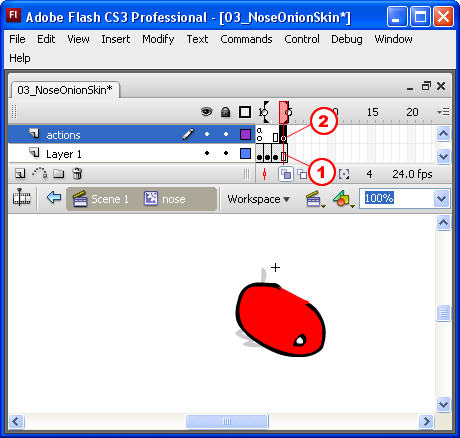
Add a new layer and name it actions. Again, it is common practice to dedicate a layer solely to ActionScript because it will save you some aggravation in the long run:

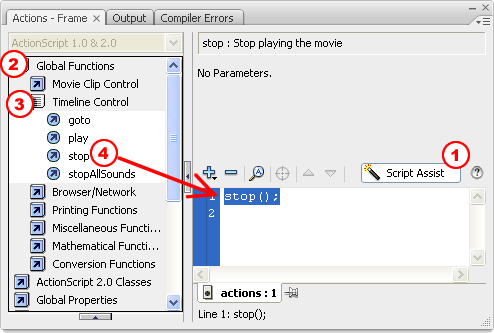
We need to stop the timeline from continually looping through all of the frames. Select the first keyframe in the actions layer and bring up the Actions window. You can either right-click on the keyframe and select Actions, or use the F9 keyboard shortcut. Now, stop the timeline:
- Turn on Script Assist
- Click Global Functions
- Click Timeline Control
- Double-Click the stop action to get it in the actions box
That's it! The nose MovieClip is going to be stuck at frame 1. Now we have to do some planning ahead. The goal is to click a button which will advance this timeline frame-by-frame. A problem will arise when we get to the final frame, where we want the timeline to loop back to frame 1 and stop. It won't do that automatically, so we'll make it.
- Insert a Frame at the end of the nose layer. This will keep the animation from "blinking" when it momentarily hits a blank frame. The user will see the same image from frame 3 before the loop happens.
- Insert a Blank Keyframe on frame 4 of the actions layer. This will allow us to create new actions on frame 4, independent of the stop(); action on frame 1.
Return to the the Actions window and add a gotoAndStop(1); action to frame 4:
- Click Global Functions
- Timeline Control
- Double-Click goto. The default gotoAndPlay(1); action should pop into the Actions window.
- Select the Go to and Stop radio button
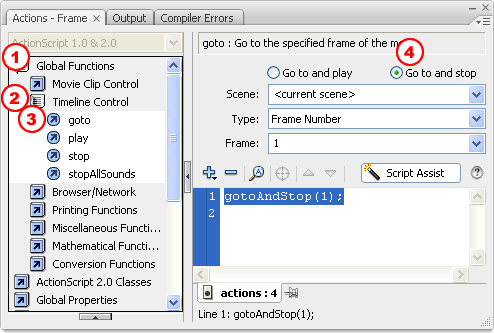
That's it! You should have a stop(); action on frame 1 and a gotoAndStop(1); action on frame 4.