Creating A PLAY Button with ActionScript 2.0
Button States
Now let's make the button look a little more interesting. Edit the button and have a look at the inner workings - the timeline is different than anything you have seen before:
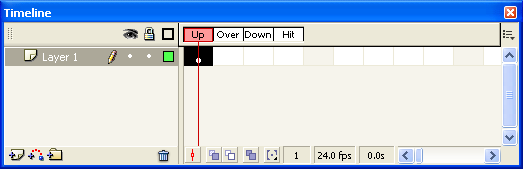
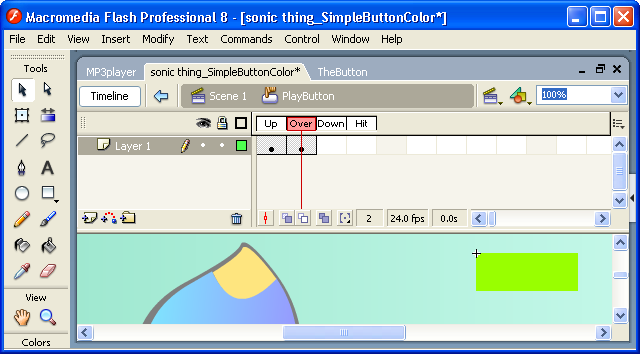
Buttons have four "States" - Up, Over, Down, and Hit. When you first convert an object to a button, you create the Up state (It's what you see when the button is just sitting on the stage). Let's change the Over state (It's what the button looks like when the mouse pointer hovers over it).
Insert Keyframe in the Over state and change the color of the rectangle:
The button functions like this now:
You can probably guess the Down state determines what the button will look like when pressed down. The Hit state is a little different - it defines the active area of the button. Don't worry about the Hit state, we will get to it in a later lesson.
Now that you know how it works, focus on making the Up, Over, and Down states look great. Of course you can use multiple layers and place animated movieClips inside the buttons. Try it!